PTZ HD
Installation Guide
Installation Guide
Installation Guide
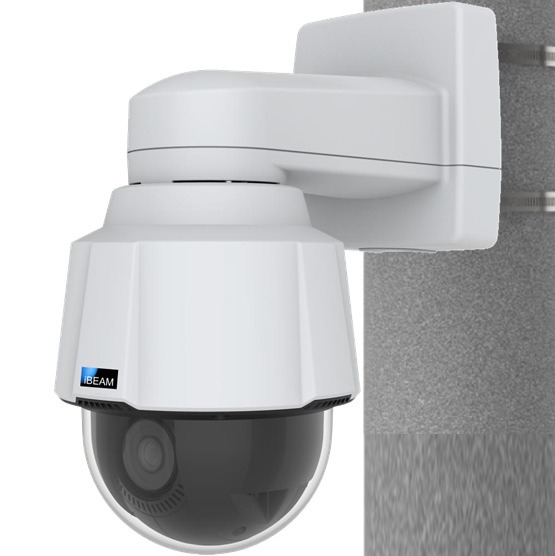
iBEAM PTZ HD Camera with Cellular Communication
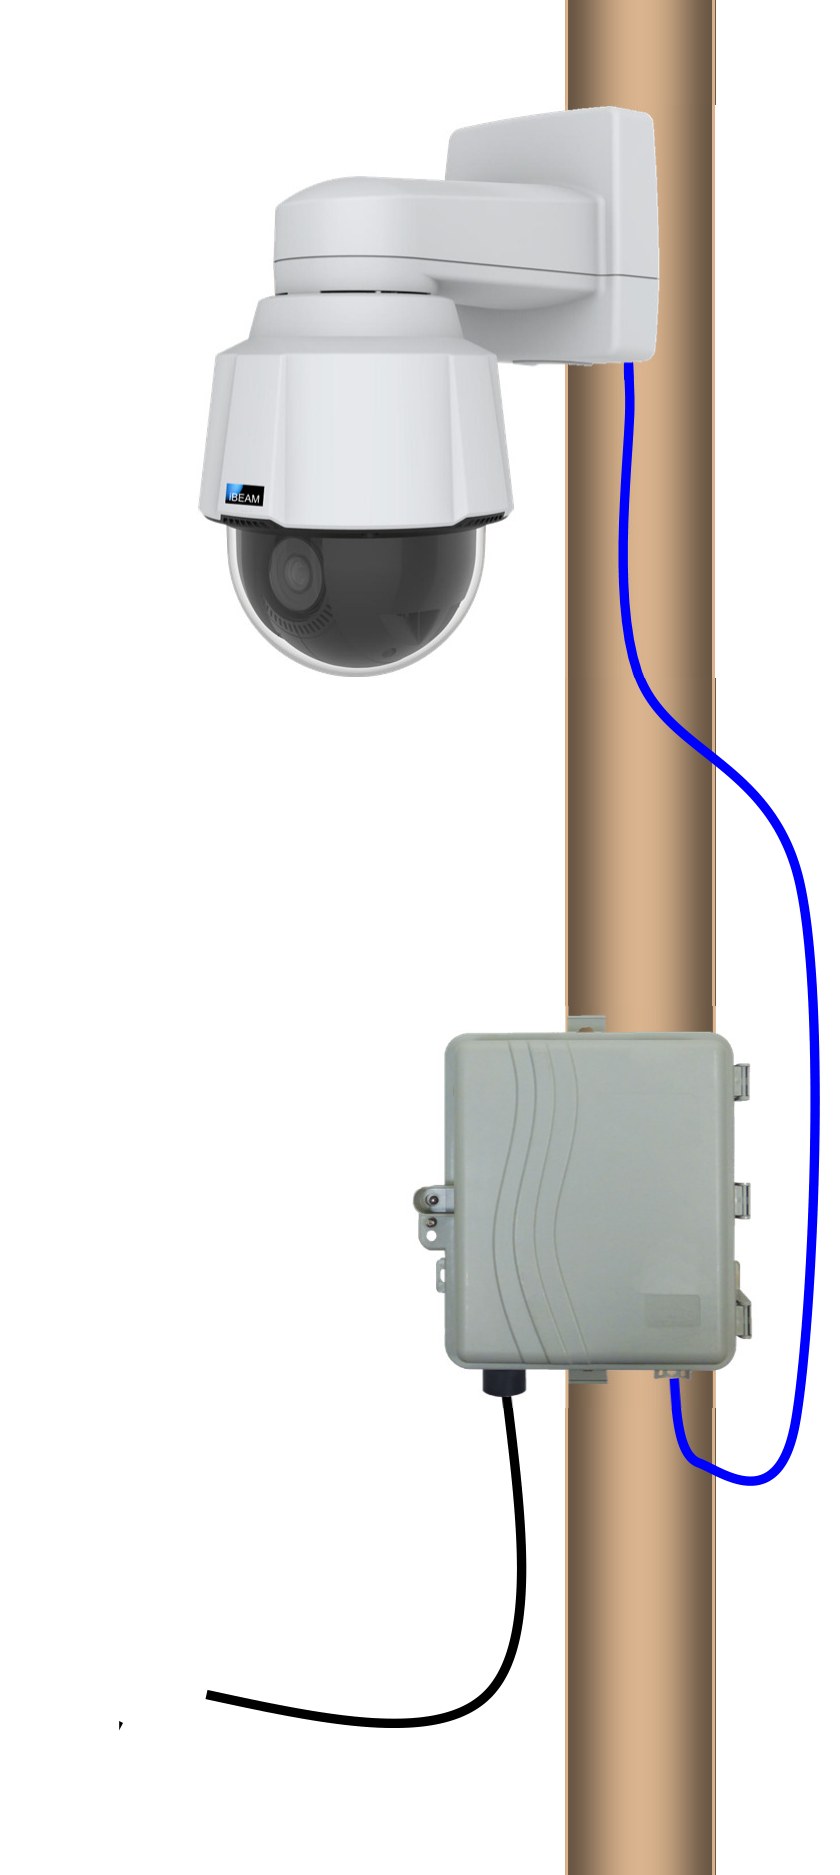
- Attach camera to a pole or other mounting surface using provided straps.
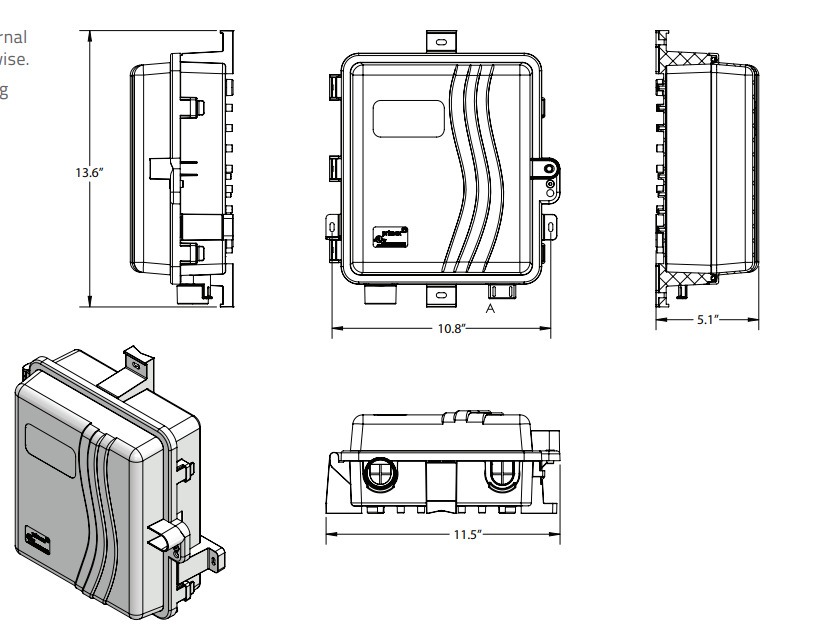
- Attach the communication box to the pole / mounting surface using the provided straps.
- Gently pull the cable gland out of its seated location, then feed the network cable into the box and reseat the gland.
- Plug the network cable into the open port of the PoE power supply.
- Plug the unit into the appropriate power source as indicated on the PoE power supply.
- After the camera has been mounted and plugged in for 15–20 minutes, you will receive an email* with information regarding how to view your camera.
- *If you don't see this email from our Support Team, please reach out to them at 800.403.0688 ext. 2 and they can verify the system is online. The Support Team is available Monday through Friday, 8:00 am–5:00 pm Mountain Standard Time. When calling, if they're assisting another customer please leave a voicemail and they'll return your call as soon as possible.
- Enjoy!
Approximate
Angle of View Estimator
Use this template on your site plan to estimate the approximate view from different locations.
58° horizontal viewing angle (360° pan)
Max 111.4' of horizontal view for every 100' of distance from the project
64.2° vertical viewing angle
Max 80.9' of vertical view for every 100' of distance from the project (40.5' above the camera level)